Home
/ Blog /
Building a Slack Huddle Clone with ReactBuilding a Slack Huddle Clone with React
October 20, 202211 min read
Share
Building Slack huddle clone
Just over a month ago in mid-August Slack unveiled a new feature called "Huddle". Slack's huddle allows the users to have audio discussions with people in their workspace and other invited users.
It was not until some days ago that my co-worker invited me to a Huddle and that's when I thought why not build it? One of the features I liked was that it would play some music if you were the only person on the call.
Slack Huddle features to cover:
- Audio Call
- Show the Dominant Speaker
- Participant List
- Play music when you're the only person on the call
Build an audio conferencing app like Clubhouse with 100ms React SDK OR Discord stages with 100ms React SDK and Next.js
Prerequisites
To follow this tutorial, you must have a basic understanding of the rudimentary principles of React. React Docs is a great way to start learning to react.
Setting up Project
I have created a starter project based on CRA + Tailwind. To make things easier and to help us focus on adding the core functionality I already created all UI React Components and utility functions that we will be using in the project.
git clone -b template https://github.com/100mslive/slack-huddle-clone.git
We are cloning here the template branch which contains our starter code while the main branch has the entire code.
Dependencies
All dependencies that we will be using are already added to the project's package.json so doing yarn or npm install should install all our dependencies. We will be using the following 100ms React SDKs libraries.
@100mslive/hms-video-react@100mslive/hms-video
Access Credentials
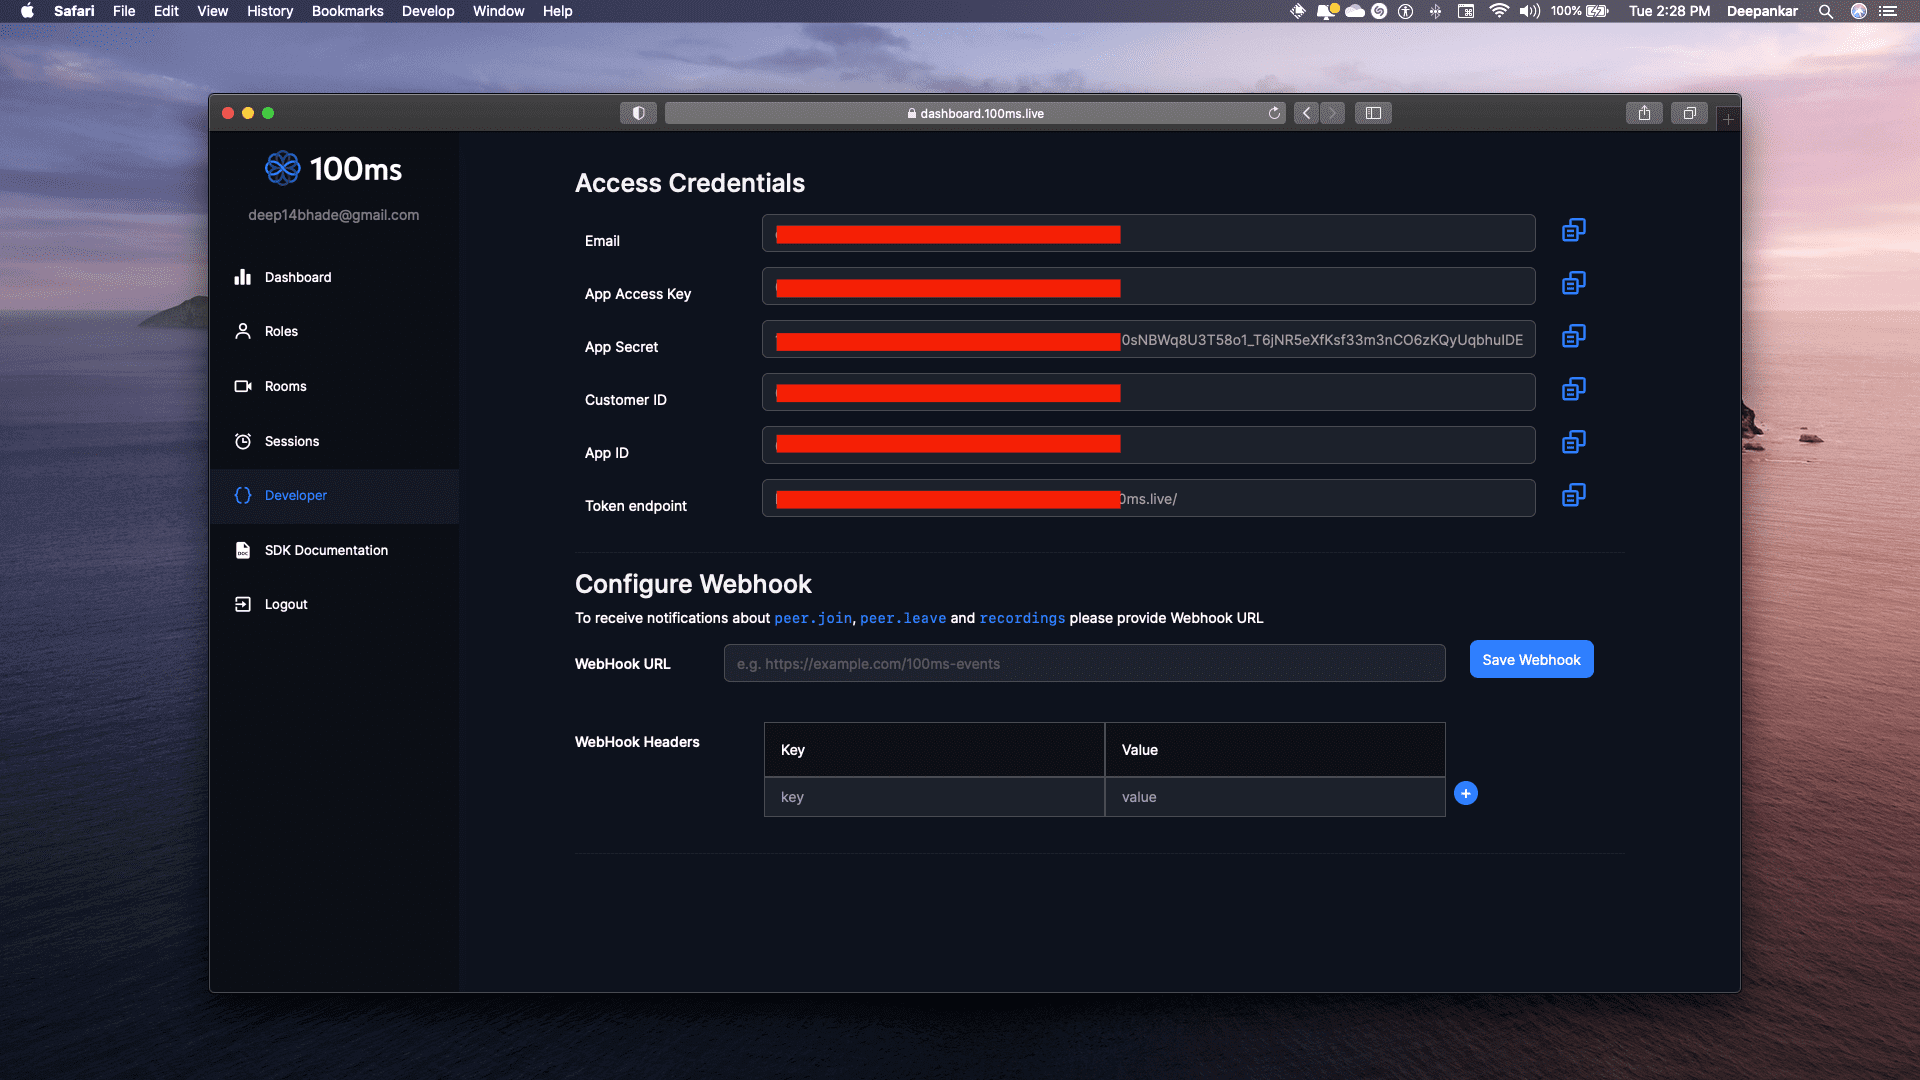
We will be needing token_endpoint & room_id from 100ms Dashboard to get these credentials you 1st need to create an account at 100ms Dashboard after your account is setup head over to the Developer Section. You can find your token_endpoint there.
Creating Roles
Before we create a room we will create a custom app, you can find it here. Click on "Add a new App", and you will be asked to choose a template, and choose "Create your Own".
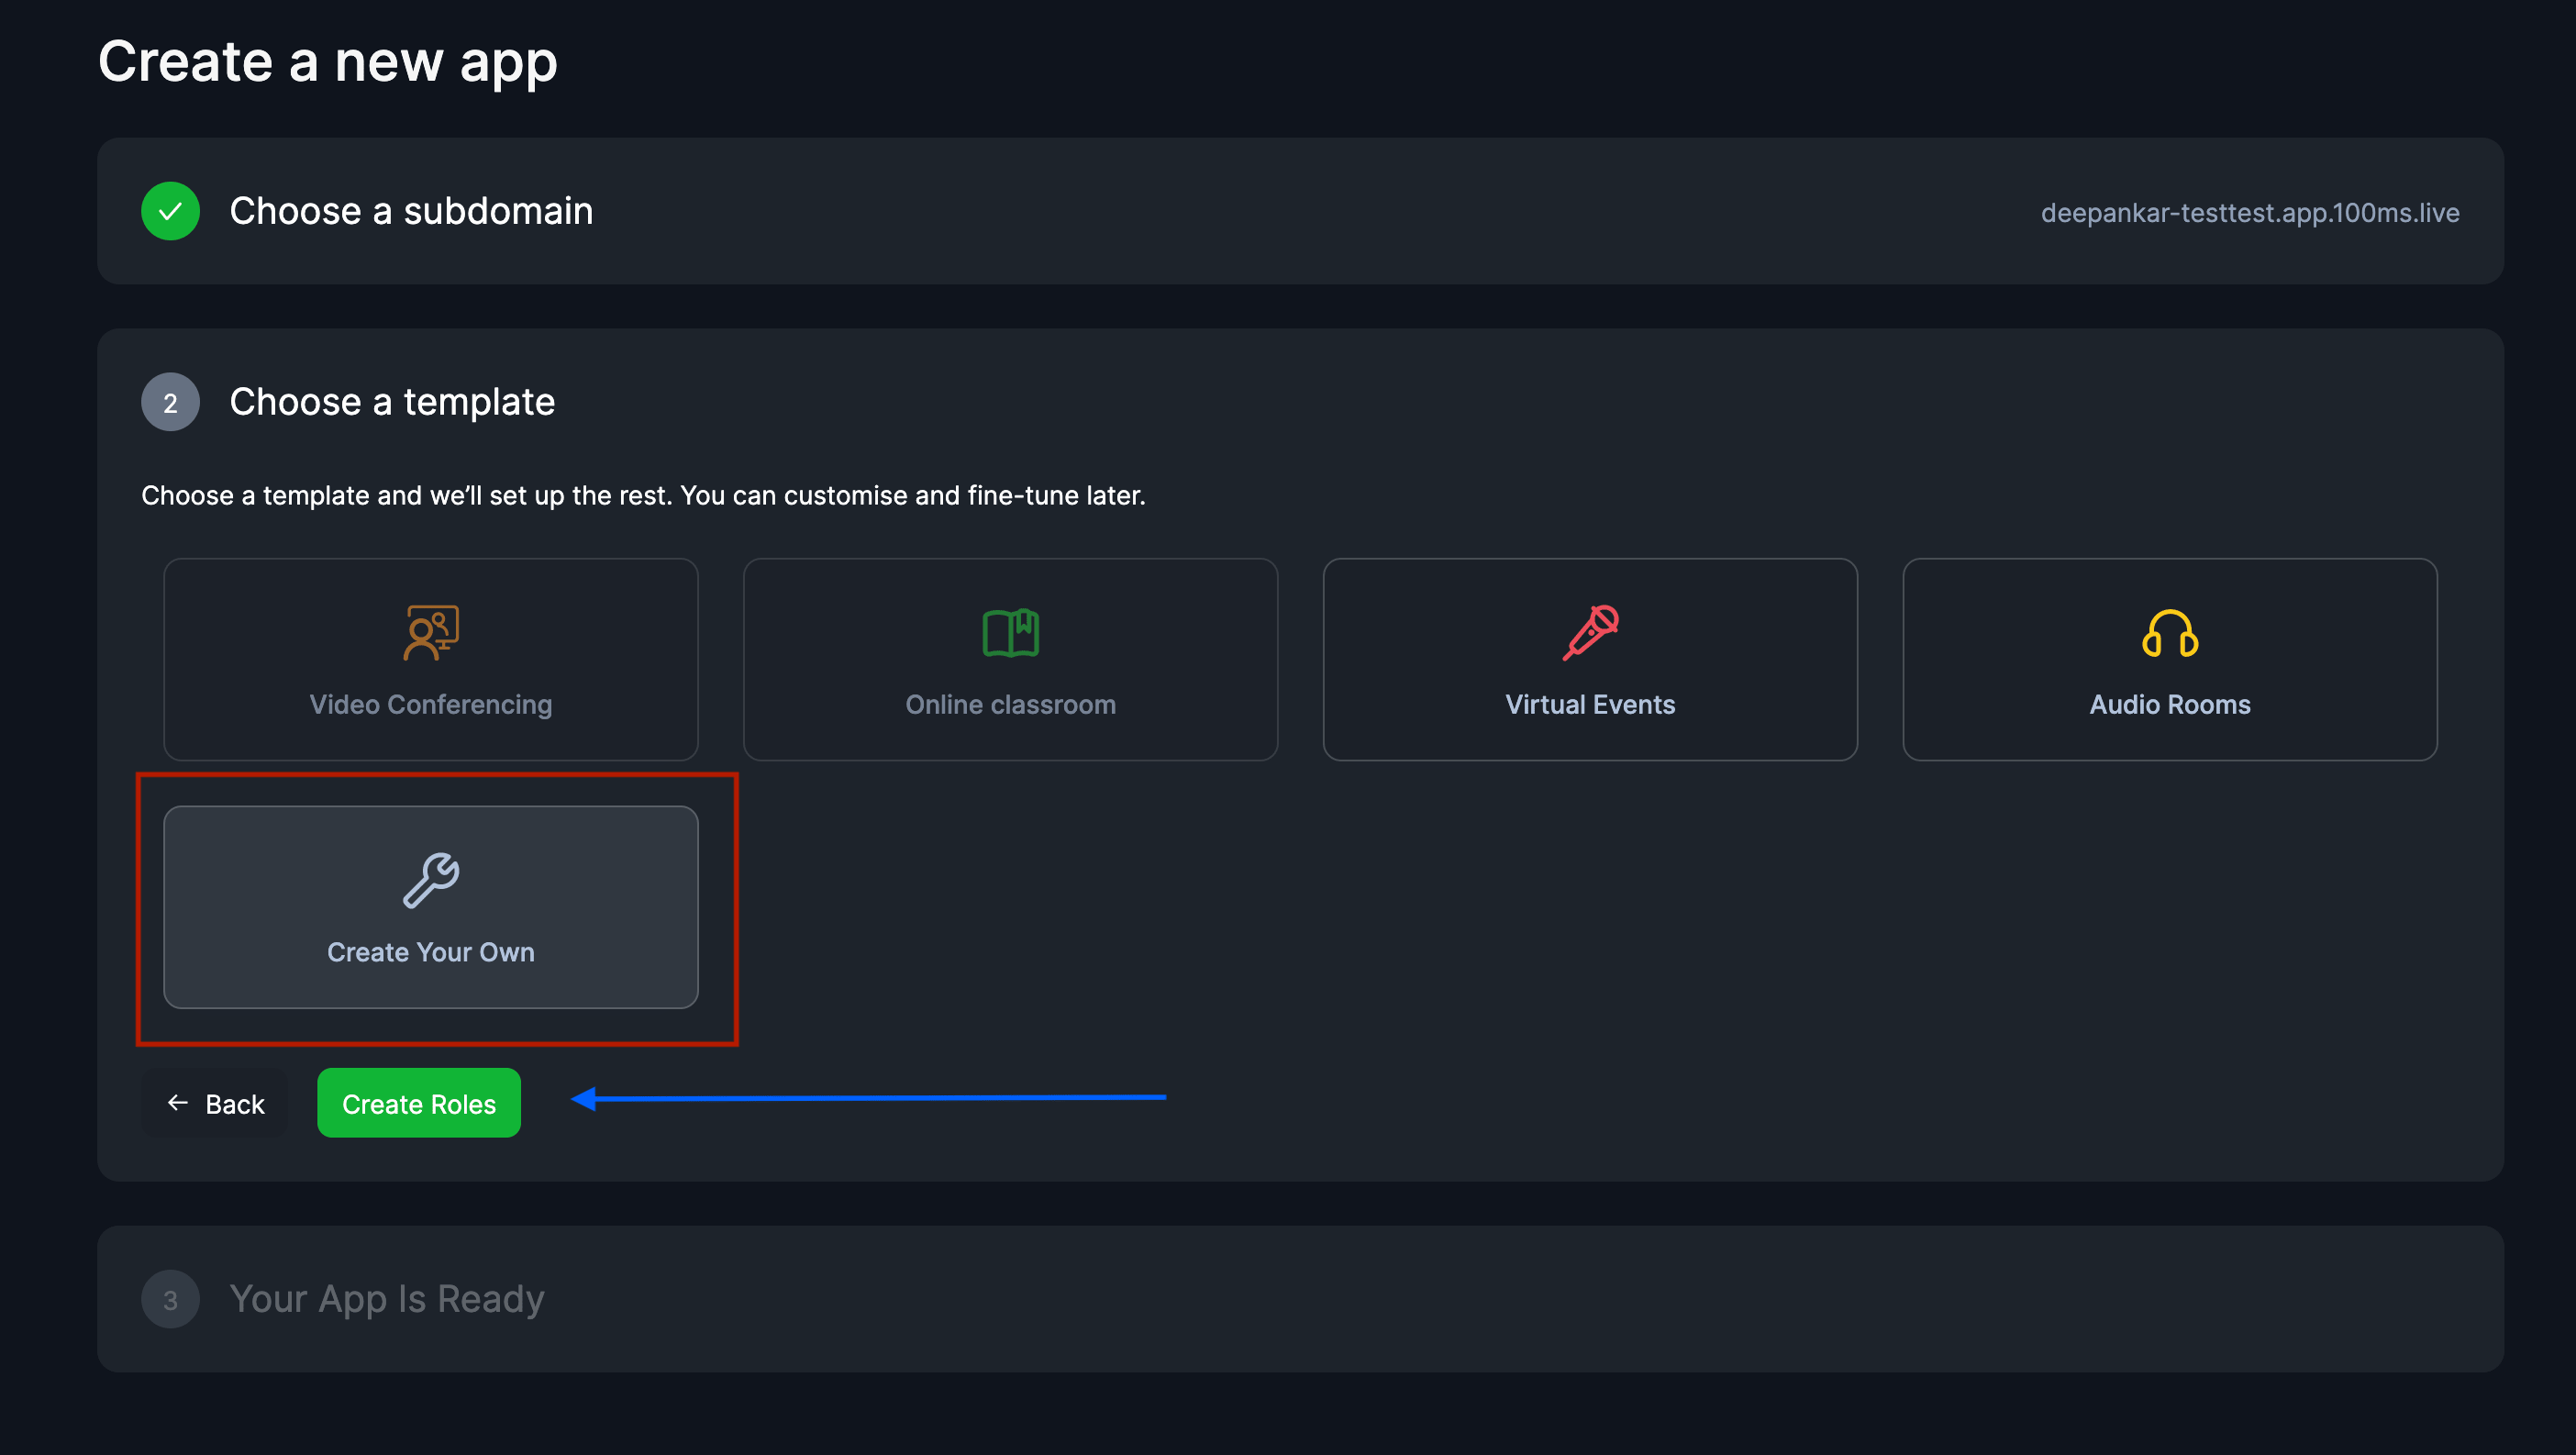
Now click on the "Create Roles" button this will open a modal where we can create our custom roles.
We are just gonna create 1 role in our app we name it speaker and we will turn on the publishing strategy "Can share audio" as on.
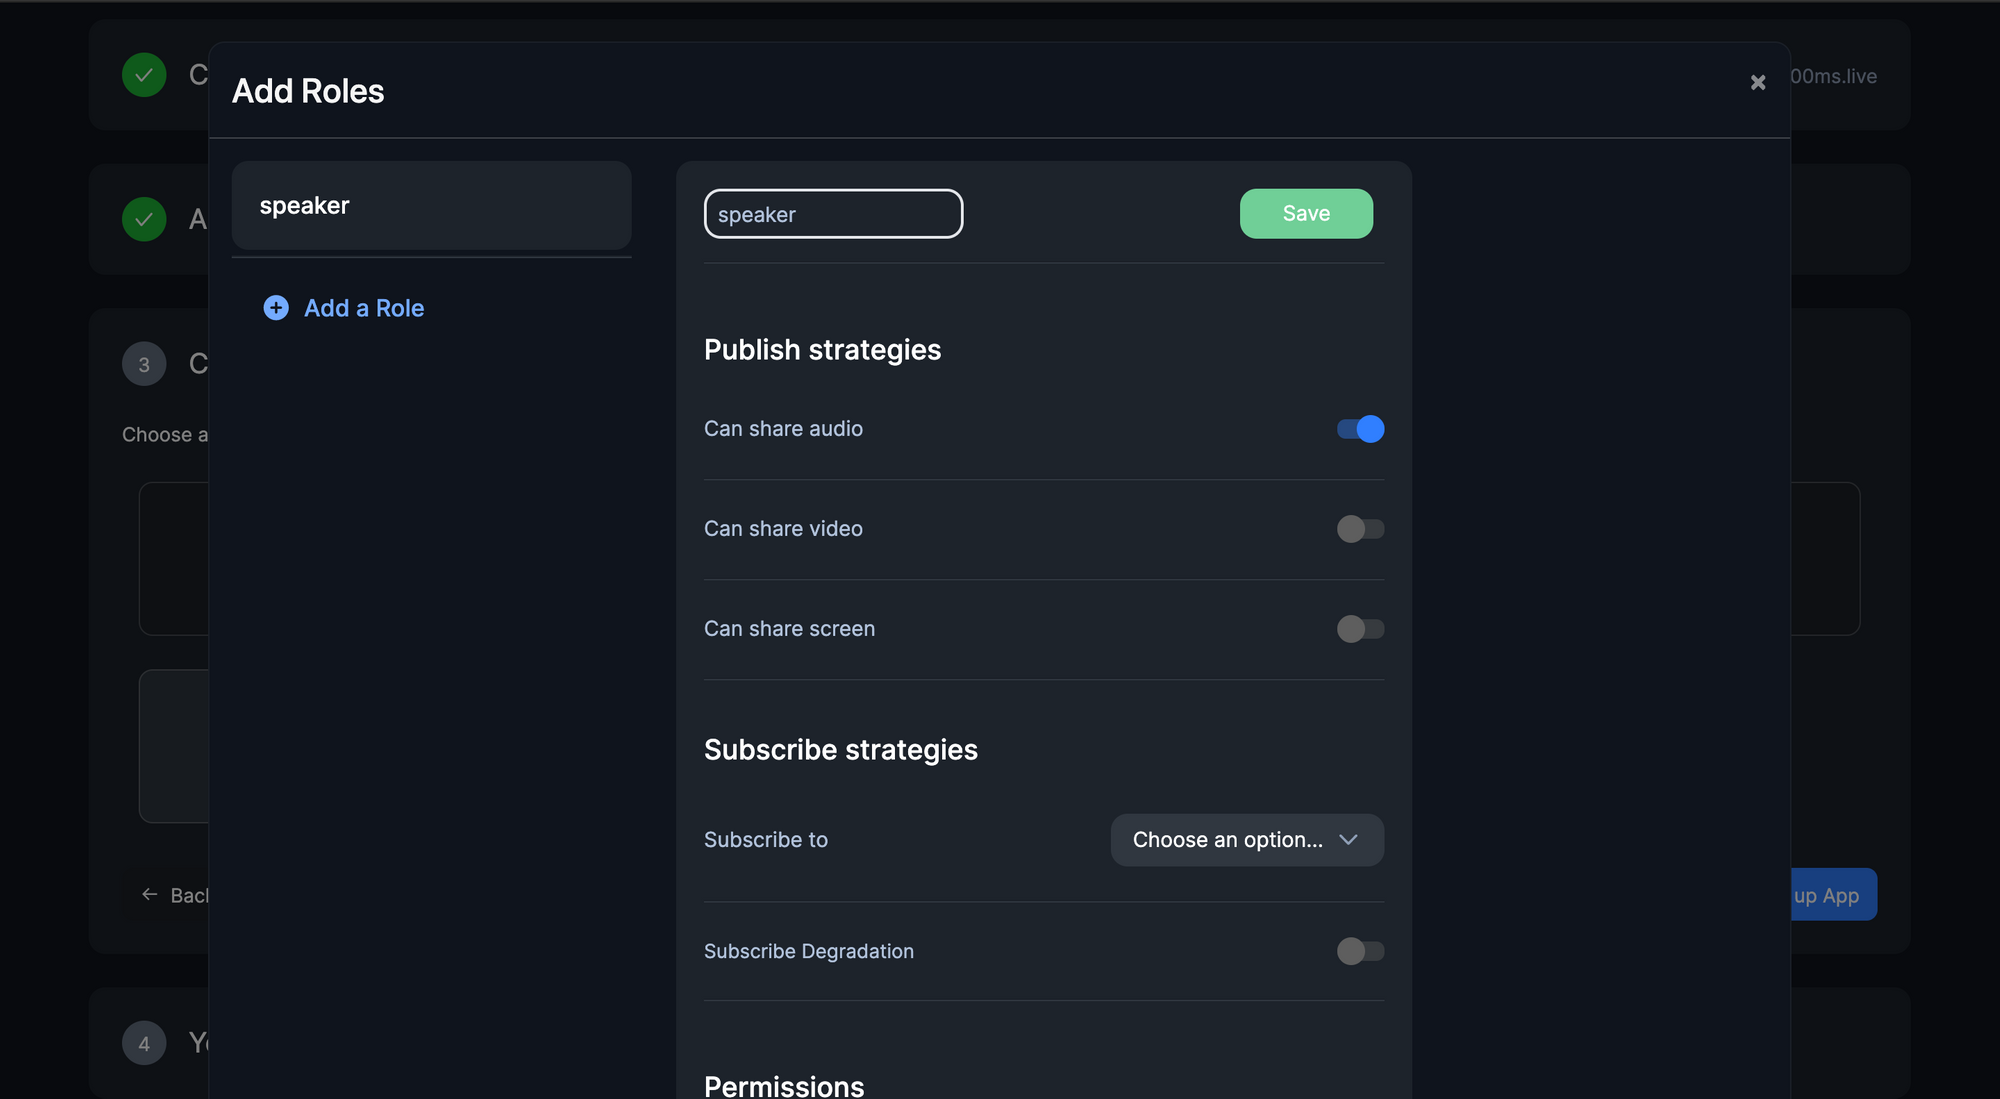
After hitting "Save" we will move on to our next step by clicking 'Set up App'. You should see your custom app being created.
Once you create an App head over to the Room's section you should see a room_id generated.
Awesome now that we have token_endpoint and room_id we will add them in our app. We will be using Custom Environment Variables for our secrets. You can run the following script to create a .env file.
cp example.env .env
Add the token_endpoint and room_id to this .env file.
// .env

REACT_APP_TOKEN_ENDPOINT=<YOUR-TOKEN-ENDPOINT>
REACT_APP_ROOM_ID=<YOUR-ROOM-ID>
Before we start programming let's go through the terminology and 100ms React Store.
Initializing the SDK
@100mslive/hms-video-react provides us with a flux-based reactive data store layer over 100ms core SDK. This makes state management super easy. Its core features:
- Store - The reactive store for reading data using selectors. The store acts as a single source of truth for any data related to the room.
- Actions - The actions interface for dispatching actions which in turn may reach out to the server and update the store.
- Selectors - These are small functions used to get or subscribe to a portion of the store.
100ms React SDK provides 3 hooks
- useHMSActions - provides core methods to alter the state of a room
join,leave,setScreenShareEnabledetc. - useHMStore - provides a read-only data store to access the state tree of the room eg.
peers,dominantSpeakeretc. - useHMSNotifications - provides notifications to let you know when an event occurs eg:
PEER_JOINED,PEER_LEFT,NEW_MESSAGE,ERROR.
The hmsStore is also reactive, which means any component using the HMSStore hook will re-render when the slice of the state, it listens to, changes. This allows us to write declarative code.
To harness the power of this Data Store we will wrap our entire App component around <HMSRoomProvider/>.
If you open src/App.jsx you can see there are two components <Join/> and <Room/> being conditionally rendered based on the isConnected variable.
- if the peer has joined the room render ->
<Room /> - if the peer hasn't joined the room render ->
<Join />
But how do we know whether the peer has joined or not? This is where HMS Store's hooks come in handy. By using the selectIsConnectedToRoom selector function to know if the peer has joined the room or not.
// src/App.jsx

import {
  HMSRoomProvider,
  useHMSStore,
  selectIsConnectedToRoom,
} from '@100mslive/hms-video-react';
import Join from './components/Join';
import Room from './components/Room';
import './App.css';

const SpacesApp = () => {
  const isConnected = useHMSStore(selectIsConnectedToRoom);
  return <>{isConnected ? <Room /> : <Join />}</>;
};

function App() {
  return (
    <HMSRoomProvider>
      <div className='bg-brand-100'>
        <SpacesApp />
      </div>
    </HMSRoomProvider>
  );
}

export default App;
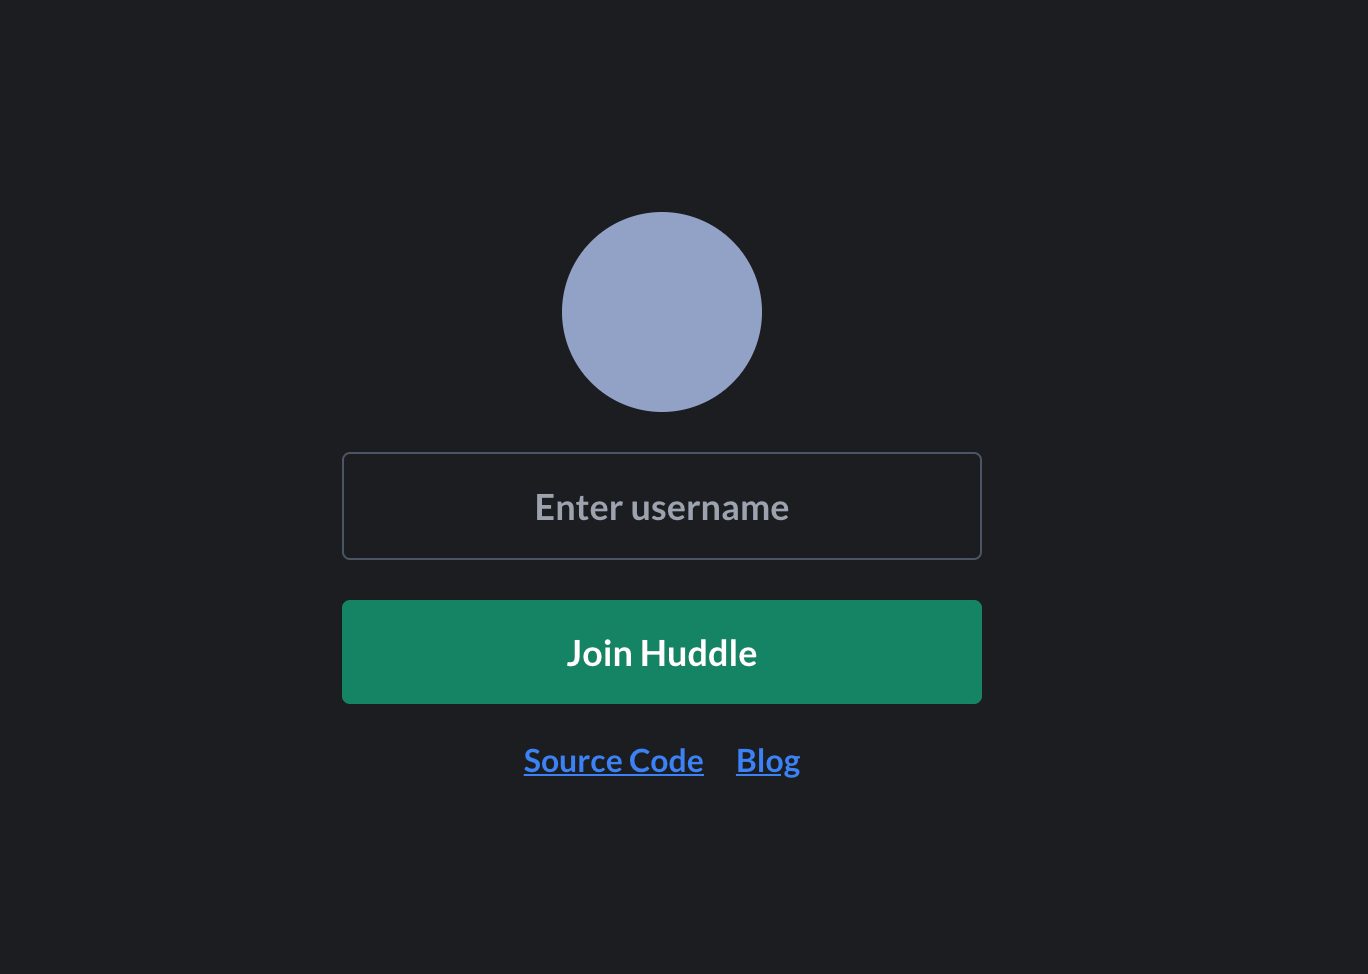
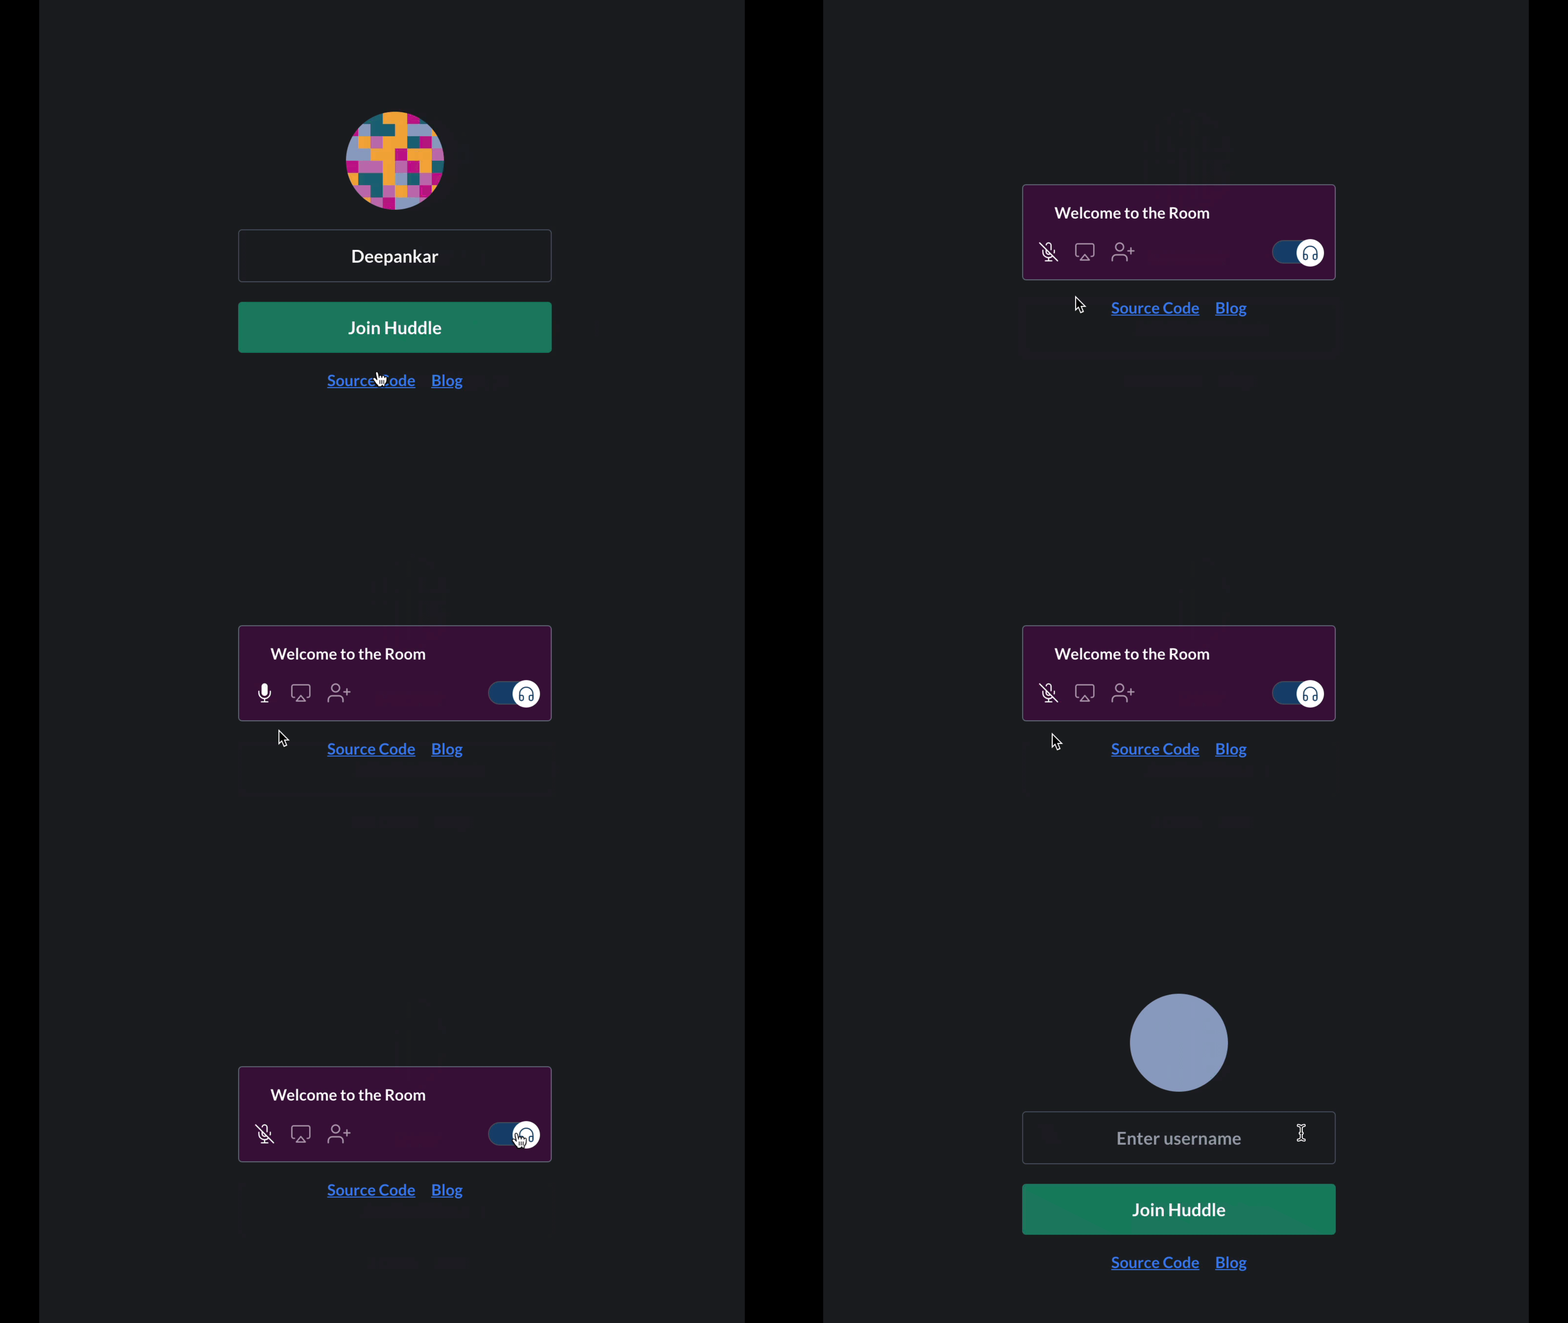
Now if we start the server with yarn start we should be able to see <Join/> being rendered because we haven't joined the room yet.
Joining Room
To join a room (a video/audio call), we need to call the join method on actions and it requires us to pass a config object. The config object must be passed with the following fields:
userName: The name of the user. This is the value that will be set on the peer object and be visible to everyone connected to the room. We will get this from the User's input.authToken: A client-side token that is used to authenticate the user. We will be generating this token with the help ofgetTokenutility function that is in the utils folder.
If we open /src/components/Join.jsx we can find the username being controlled by controlled input and role which is "speaker". Now we have Peers' username and role let's work on generating our token.
We would generate our token whenever the user clicks on "Join Huddle" once it is generated we will call the actions.join() function and pass the token there.
We will use getToken utility function defined in src/utils/getToken.js it takes Peer's role as an argument. What it does is makes a POST request to our TOKEN_ENDPOINT and return us a Token.
NOTE: You must add
REACT_APP_TOKEN_ENDPOINT&REACT_APP_ROOM_IDto your .envbefore this step.
// /src/components/Join.jsx

import React, { useState } from 'react';
import Avatar from 'boring-avatars';
import getToken from '../utils/getToken';
import { useHMSActions } from '@100mslive/hms-video-react';
import Socials from './Socials';

const Join = () => {
  const actions = useHMSActions();
  const [username, setUsername] = useState('');
  const joinRoom = () => {
    getToken('speaker').then((t) => {
      actions.join({
        userName: username || 'Anonymous',
        authToken: t,
        settings: {
          isAudioMuted: true,
        },
      });
    });
  };
  return (
    <div className='flex flex-col items-center justify-center h-screen bg-brand-100'>
      <Avatar size={100} variant='pixel' name={username} />
      <input
        type='text'
        placeholder='Enter username'
        onChange={(e) => setUsername(e.target.value)}
        className='px-6 mt-5 text-center py-3 w-80 bg-brand-100 rounded  border  border-gray-600 outline-none placeholder-gray-400 focus:ring-4 ring-offset-0 focus:border-blue-600 ring-brand-200 text-lg transition'
        maxLength='20'
      />
      <button
        type='button'
        onClick={joinRoom}
        className='w-80 rounded bg-brand-400 hover:opacity-80 px-6 mt-5 py-3 text-lg focus:ring-4 ring-offset-0 focus:border-blue-600 ring-brand-200 outline-none'
      >
        Join Huddle
      </button>
      <Socials />
    </div>
  );
};

export default Join;
Now if we click on "Join" our token would be generated after which it will call actions.join() which will join us in the Room making isConnected to true and hence rendering <Room/> component.
For a more detailed explanation refer to the docs for "Join Room".

We can see "Welcome to the Room" now but none of the buttons work so let's implement the ability to Mute/Unmute ourselves.
Mute/Unmute
If you open Controls.jsx you can see there's a variable isAudioOn which will store the peer's audio/microphone status (muted/unmuted).
For the peer to leave the room we call the leaveRoom function from actions and to get the peer's audio status we use the selectIsLocalAudioEnabled selector function from the store. Now if we want to toggle this audio status we will use the method setLocalAudioEnabled from actions which takes boolean value as param.
// src/components/Controls.jsx

import React from 'react';
import MicOnIcon from '../icons/MicOnIcon';
import MicOffIcon from '../icons/MicOffIcon';
import DisplayIcon from '../icons/DisplayIcon';
import UserPlusIcon from '../icons/UserPlusIcon';
import HeadphoneIcon from '../icons/HeadphoneIcon';
import {
  useHMSStore,
  useHMSActions,
  selectIsLocalAudioEnabled,
} from '@100mslive/hms-video-react';

const Controls = () => {
  const actions = useHMSActions();
  const isAudioOn = useHMSStore(selectIsLocalAudioEnabled);
  return (
    <div className='flex justify-between items-center mt-4'>
      <div className='flex items-center space-x-4 '>
        <button
          onClick={() => {
            actions.setLocalAudioEnabled(!isAudioOn);
          }}
        >
          {isAudioOn ? <MicOnIcon /> : <MicOffIcon />}
        </button>
        <button className='cursor-not-allowed opacity-60' disabled>
          <DisplayIcon />
        </button>
        <button className='cursor-not-allowed opacity-60' disabled>
          <UserPlusIcon />
        </button>
      </div>
      <div
        className={`w-12 h-6 rounded-full relative border border-gray-600 bg-brand-500`}
      >
        <button
          onClick={() => actions.leave()}
          className={`absolute h-7 w-7 rounded-full flex justify-center items-center bg-white left-6 -top-0.5`}
        >
          <HeadphoneIcon />
        </button>
      </div>
    </div>
  );
};

export default Controls;
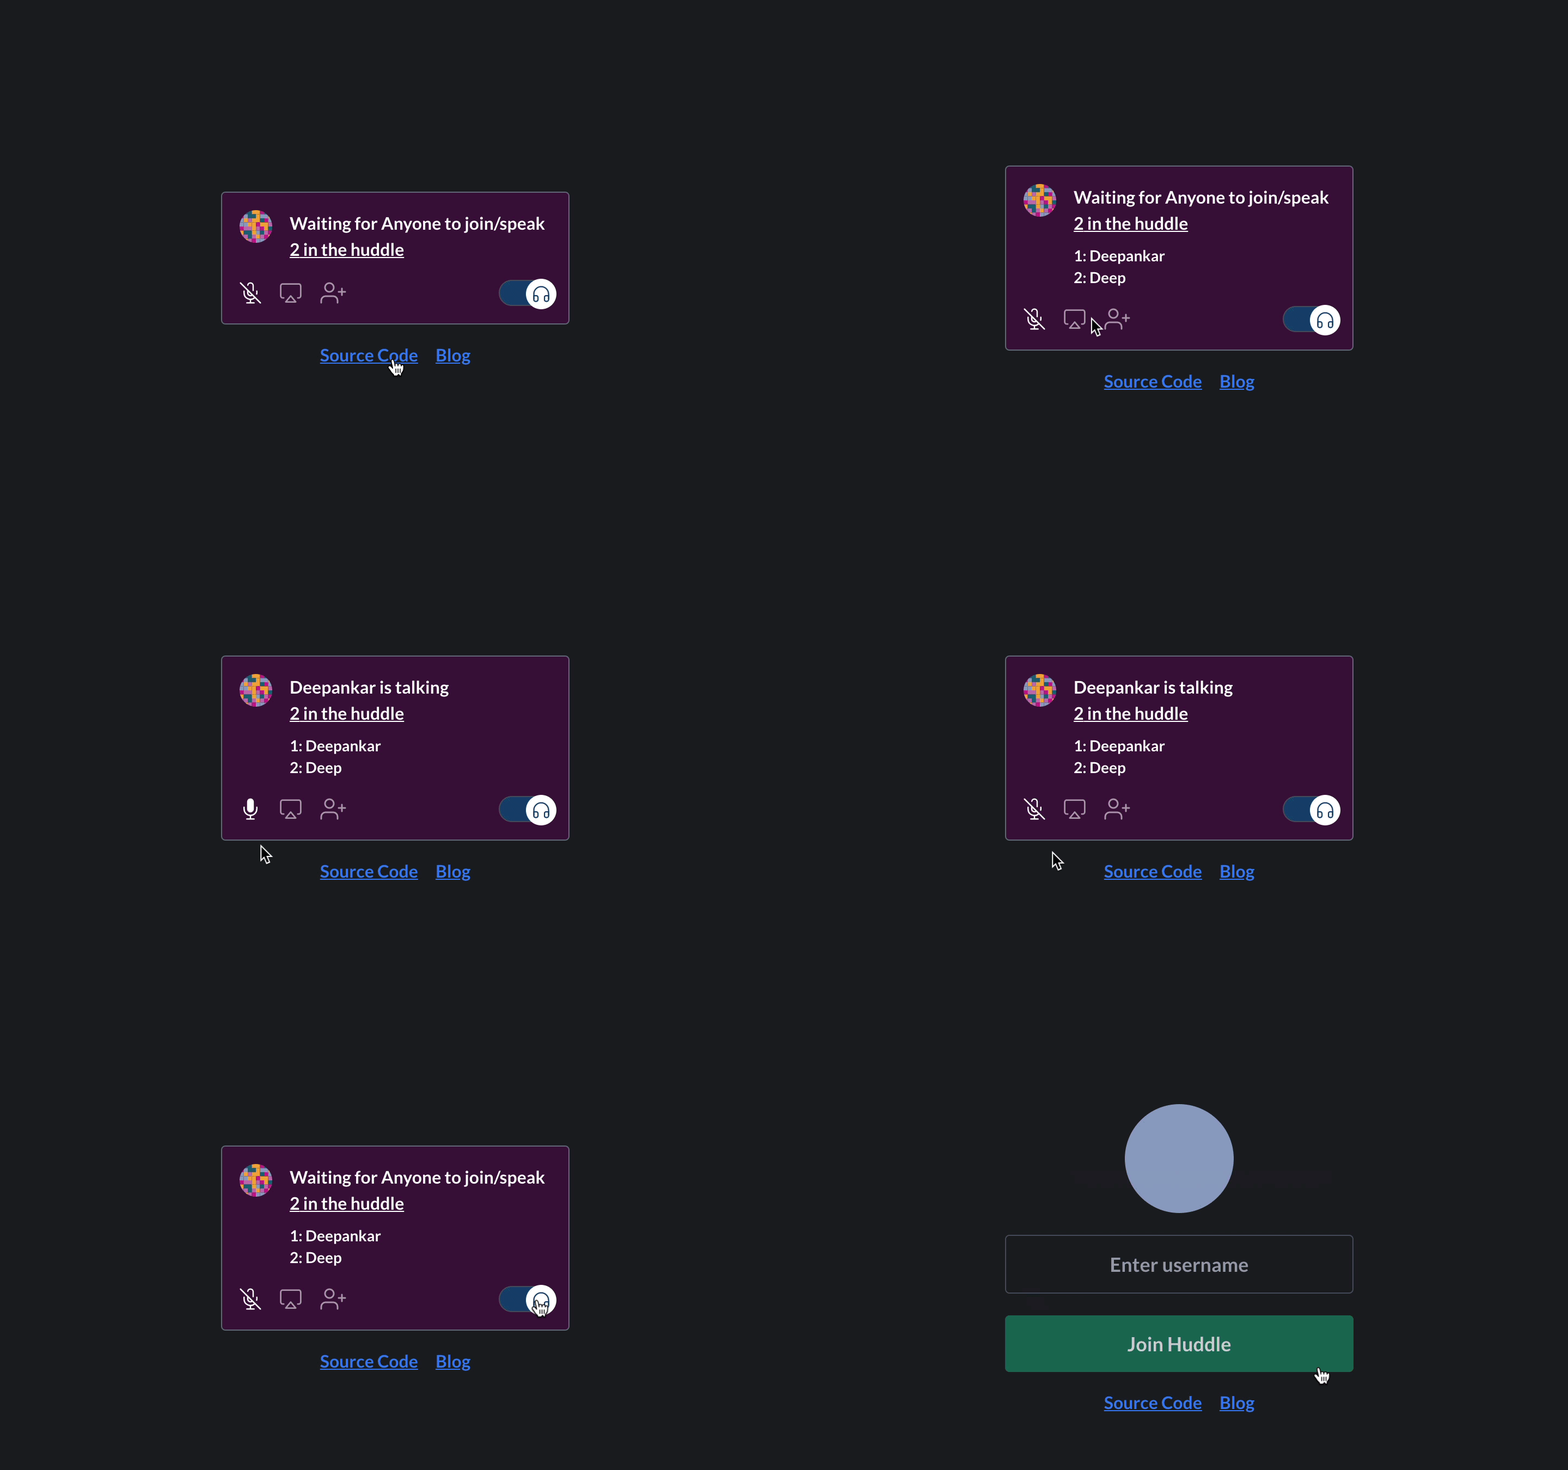
Now let's work on the next part which is the following:
- Showing all peers in the room
- Displaying the peer's name who is speaking
- Getting the local Peer's info
To get all peers we will use the selectPeers selector function. This will return us to an array of all peers in the room.
Each peer object stores the details of individual participants in the room. You can check out the full interface of HMSPeer in our API-reference docs.
Now to know the peer who's speaking we use selectDominantSpeaker which gives us an HMSPeer object, similarly to get the localPeer we will use selectLocalPeer.
Now, let's import UserAvatar, Participants, LonelyPeer & DominantSpeaker these components take some props which they would parse and show in the UI.
You can open these components and see the implementation in more detail.
// src/components/Room.jsx

import React from 'react';
import Controls from './Controls';
import Layout from './Layout';
import {
  selectPeers,
  useHMSStore,
  selectDominantSpeaker,
  selectLocalPeer,
} from '@100mslive/hms-video-react';
import UserAvatar from './UserAvatar';
import Participants from './Participants';
import LonelyPeer from './LonelyPeer';
import DominantSpeaker from './DominantSpeaker';

const Room = () => {
  const localPeer = useHMSStore(selectLocalPeer);
  const peers = useHMSStore(selectPeers);
  const dominantSpeaker = useHMSStore(selectDominantSpeaker);
  return (
    <Layout>
      <div className='flex'>
        <UserAvatar dominantSpeaker={dominantSpeaker} localPeer={localPeer} />
        <div className='ml-4'>
          <DominantSpeaker dominantSpeaker={dominantSpeaker} />
          {peers.length > 1 ? <Participants peers={peers} /> : <LonelyPeer />}
        </div>
      </div>
      <Controls />
    </Layout>
  );
};

export default Room;
Now the final feature which is the ability to play a song when you're the only person in the Room.
So we should play the Audio when peerslength === 1 (basically lonely peer). We will use useRef & useEffect react hooks.
Whenever the AudioPlayer component mounts we will start playing the audio file and pause it when we are no longer the lonely peer.
// src/components/AudioPlayer.jsx

import React from 'react';

const AudioPlayer = ({ length }) => {
  const audioRef = React.useRef(null);
  React.useEffect(() => {
    if (audioRef.current) {
      if (length === 1) {
        audioRef.current.play();
      } else {
        audioRef.current.pause();
      }
    }
  }, [length]);
  return <audio autoPlay loop ref={audioRef} src='/temp.mp3'></audio>;
};

export default AudioPlayer;
Now let's save and import <AudioPlayer /> in Room.jsx
// src/components/Room.jsx


import React from 'react';
import Controls from './Controls';
import Layout from './Layout';
import {
  selectPeers,
  useHMSStore,
  selectDominantSpeaker,
  selectLocalPeer,
} from '@100mslive/hms-video-react';
import UserAvatar from './UserAvatar';
import Participants from './Participants';
import LonelyPeer from './LonelyPeer';
import DominantSpeaker from './DominantSpeaker';
import AudioPlayer from './AudioPlayer';

const Room = () => {
  const localPeer = useHMSStore(selectLocalPeer);
  const peers = useHMSStore(selectPeers);
  const dominantSpeaker = useHMSStore(selectDominantSpeaker);
  return (
    <Layout>
      <div className='flex'>
        <AudioPlayer length={peers.length} />
        <UserAvatar dominantSpeaker={dominantSpeaker} localPeer={localPeer} />
        <div className='ml-4'>
          <DominantSpeaker dominantSpeaker={dominantSpeaker} />
          {peers.length > 1 ? <Participants peers={peers} /> : <LonelyPeer />}
        </div>
      </div>
      <Controls />
    </Layout>
  );
};

export default Room;
Now if you join and you should be able to hear a song. Open a new tab and join and the audio should stop.
Amazing right?
We were able to accomplish so many things with just a few lines of code.
You can check out the entire code in this repo.
Engineering
Share
Related articles
See all articles